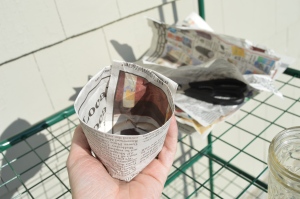
Seed starting is pure pleasure for me- it means that gardening is right around the corner. I absolutely love growing my own food as well as a myriad of interesting plants, which are picked for either their flower or foliage (sometimes both.) Three seasons ago I started gardening and as a result, starting plants from seed. Every season I try a new way to do so, just to experiment: the first year I used a seed starting kit that I ordered through Burpee and loved it- it was an eco-friendly self watering kit. Pretty fantastic and the set up couldn’t have been easier in any way. I will be using this set up again! Last year I used a basic set up that can be found at any hardware store- seed starting potting mix (I didn’t like the mix so this year I’m using a different one) and seed starter pots. I reused the Burpee tray minus the self watering mat. For my tomatoes I used eggshells and seed starter potting mix- I loved that set up and used the egg carton as a tray. Eggshells can go directly into the ground and fertilize the plant to boot. Can’t- and didn’t- go wrong there. The seed starter pots were not a favorite of mine and produced more waste than I wanted. I’m sure there are biodegradable ones but I didn’t come across any. This year, as you can see in the photo above, I am using newspaper as my seed starter pots as they are biodegradable and can be put right into the ground. I decided my mission this year was to use only what can be found at a grocery or hardware store- i.e., easily found and cheap items. For a tray I am using a foil roasting pan- I will reuse these for as long as they will hold up and they are ridiculously cheap. For markers I am using painted clothespins and am trying a new seed starting mix. (Note: I purposefully have chosen to not discuss which seed starting mixes I have used and am using this year because it isn’t necessary for this post. Every gardener has their own preferences and just because I do not like one does not mean it is an inferior product.)
You will need:
newspaper
scissors
water
mason jar or tin can
seeds
seed starting mix
 The first step is really simple- cut up the newspaper. I did this by opening it up and cutting along the creases. From there I cut in half (width wise, not length wise.) Then I rolled up the mason jar in the newspaper as shown above, making sure to leave the mouth of the jar exposed.

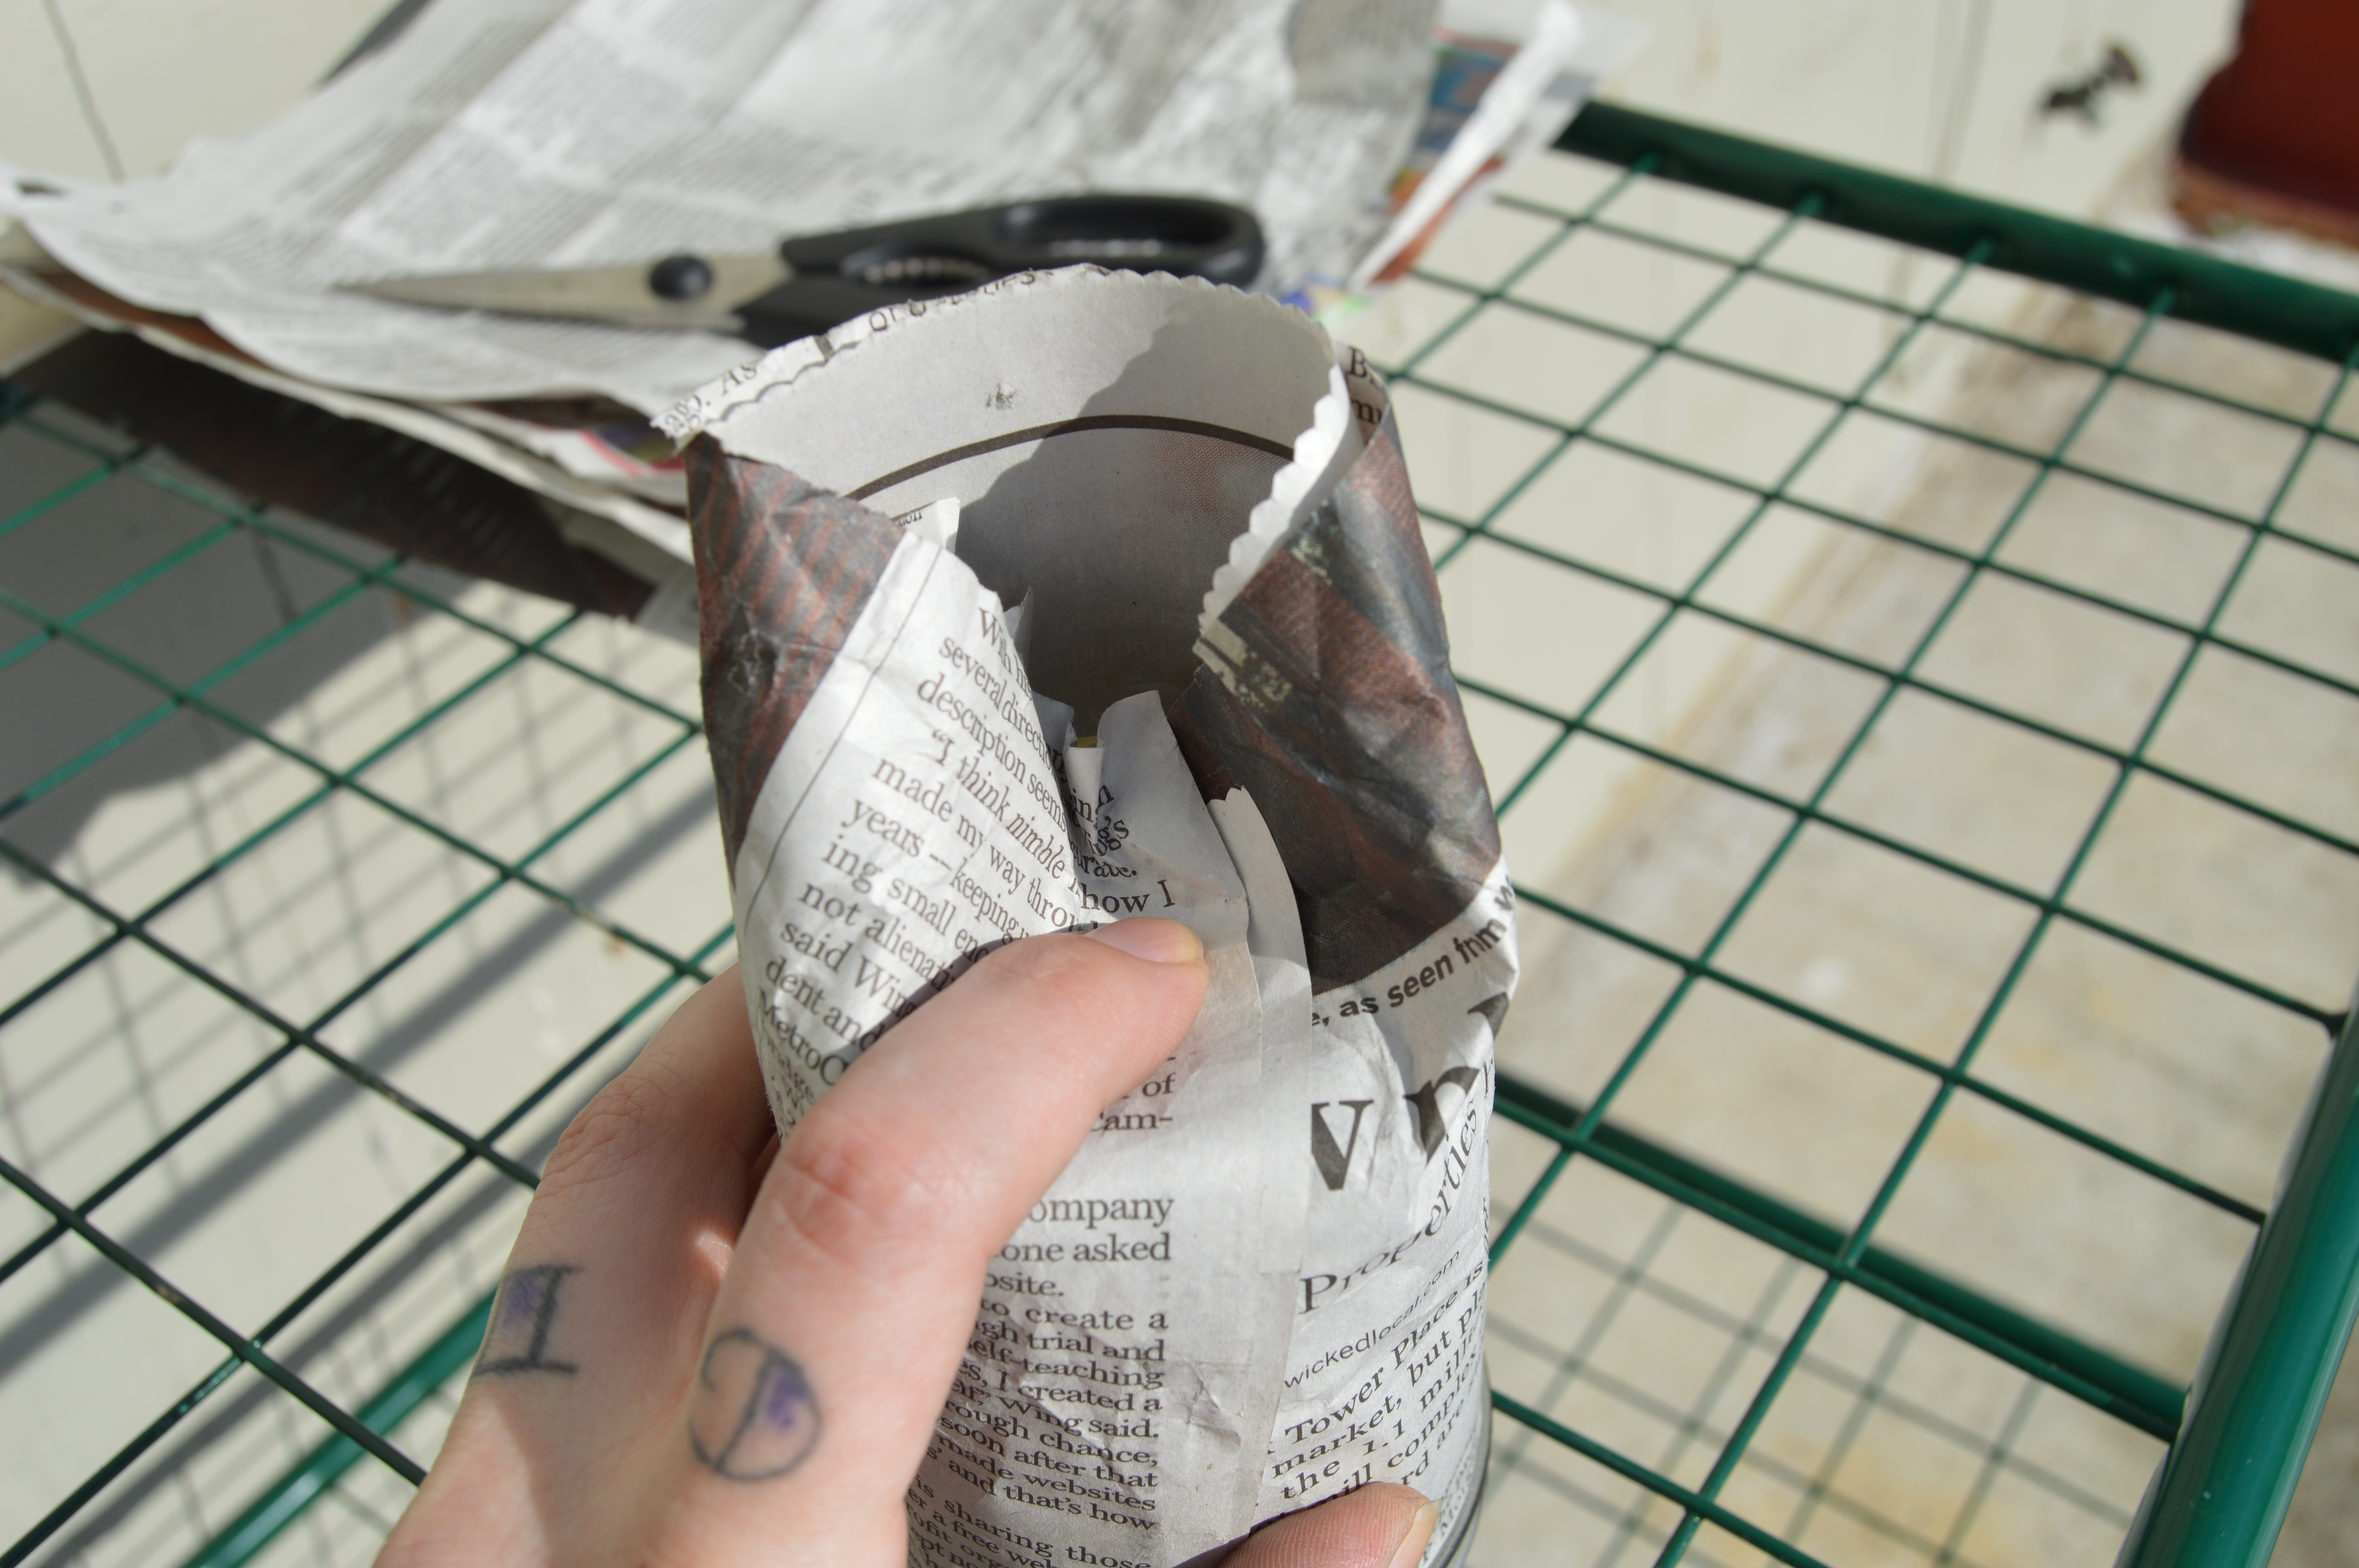
Fold the ends into the mouth of the mason jar 3 times (as shown above.) At this point I would dip the folded bottom (with mason jar still inside) into the water to soak the paper, place the newly made newspaper cup onto a hard surface (I did this directly onto the green shelving of my greenhouse frame and it worked fine) and turn the mason jar back and forth a few times (while pushing down) to help shape the bottom of your newspaper cup.
This is what your cup should look like at this point.

Next up, fold the ends down. I dipped my fingers into the water to help shape the edges. From here I placed the soil into the cups and placed in the tray. I made as many newspaper cups as it took to fill the tray and then placed in the seeds. Once I marked them with my clothespins, I watered them and placed the greenhouse covering (a zipable, UV protected vinyl sheath- it works great!) and am now waiting to see the little guys grow.

 As you can see, I’m growing cucumbers, baby pam pumpkins (for pumpkin pies) and cherry tomatoes. I’ll be starting up new trays as I get some more seeds but the rest of my plants need to be direct sowed. What are you growing in your garden this year? xo, Ev.
 East Gloucester.
 East Gloucester.
 Atlantic Beach, Florida. (One Ocean Resort. This was taken the weekend my husband proposed to me.)
 Dogtown. (This particular part is in Rockport, MA.)
 Lanesville, MA.