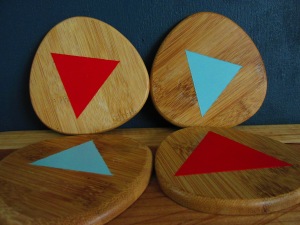
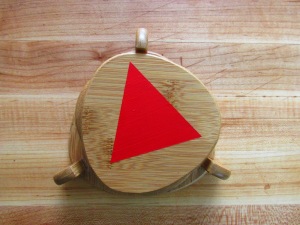
 How fun are these?! I’ve been loving all of the geometric designs out there and wanted to bring some of those simple shapes into my own home. I bought these coasters from a thrift store for a meager $2.50 and used some leftover house paint to paint some triangles- it was as easy as that. Of course, now that I have finished this quick, easy and fun project I have decided that I want to re-vamp some glass coasters I have (but never use.) What fun project have you been working on lately? Use the hashtag #knowloveknowcolor on Instagram for a chance to be featured on the @knowloveknowhope site! xo, Ev.
Monthly Archives: October 2014
The One Fall Clutch You’ll Need
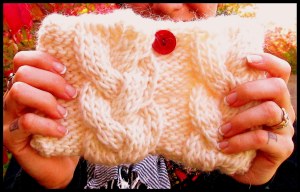 This pattern was inspired by warmth, coziness and one of my favorite seasons: fall. The pattern is fairly easy (as long as you already know how to cable) and works up quick- it took me an hour to knit it and sew it together. It’s also a great way to use up leftover yarn. Since it’s so quick, why not make a bunch in different colors?!
Materials needed:
1 skein of your favorite bulky yarn (You’ll use about a quarter of it.)
Size US10 needles (I used straight needles but circular needles works as well)
Darning Needle
1 Button (since there won’t be a button hole, make sure whatever button you choose can fit through your stitches easily yet without falling out.)
Scissors
Skills Needed:
Cabling
Mattress stitch
Pattern:
Cast on 39 stitches
Row 1: purl 3, knit 12, purl 4, knit 12, purl 8
Row 2: knit 3, purl 12, knit 4, purl 12, knit 8
Row 3: purl 3, cable8back, knit 4, purl 4, cable8back, knit 4, purl 8
Row 4 and all even rows: same as row 2
Row 5: same as row 1
Row 7: purl 3, knit 4, cable8forward, purl 4, knit 4, cable8forward, purl 8
Row 9: same as row 1
Row 11: same as row 3
Row 13: same as row 1
Row 15: same as row 7
Row 16: same as row 1
Knit rows 1-16 three times for a total of 48 rows
Bind off and weave in ends. Piece should measure 10 inches.
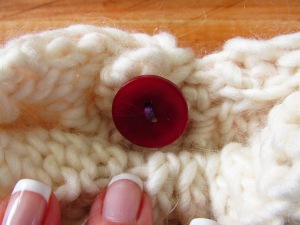
Fold in half, making sure to bring the cast on edge and the bind off edges together- this is your top. Using the mattress stitch (this way you will get an invisible seam) sew up the sides and 3 inches on each side of the top, leaving a 3 inch gap in the middle (piece should measure 9 inches across and 5 inches in length once folded.) Once you weave in those ends, all that’s left is the button. For this I took a single length of yarn thin enough to get through the button holes and threaded it through the back of a stitch (threading it through the back of a cable will allow you to hide it from the outside and it will match up with purled stitches on the other side in which you can put the button through to close your clutch.) Once threaded, pull the yarn so the ends match up and put one of those ends through a button hole, pushing the button all the way down to your fabric.Thread the other hole and tie together the ends under the buttons- to secure it I tied it three times. It should look like this:
 And that’s it! An easy, beautiful clutch perfect for evening or daytime use. I already have plans to make more using my leftover bulky yarn for stripes. After all, a girl can never have enough stripes! Show me your finished project using the hashtag #knowloveknowcolor on Instagram. If you have any questions, feel free to use the comments section! Happy knitting! xo, Ev.
Natural Wool Dying
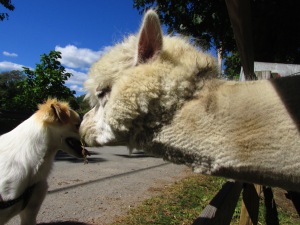
Pokeberries grow in abundance out where I live and after finding out they work great as a natural dye using minimal ingredients, I decided to give it a whirl. This is my first time dying anything other than my hair and it was incredibly easy! I will definitely be experimenting with other ways to dye wool and fibers. As for what I chose to dye, I have a fantastic neighbor who has alpacas. I mean, these cuties are the best- super friendly and curious.
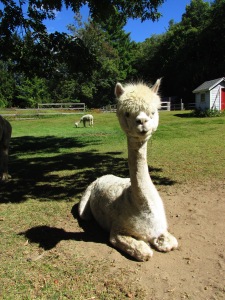 Meet Clover (also shown below, nuzzling myself and my dog, Sprocket!)
 This guy didn’t have a name as of the time I met him. This was taken in mid September when he was newly born. Already he is sweet & friendly and comes up to say hello.
 I love her haircut! This is Bella. She’s a little standoff-ish but also sweet.
 Pokeberries truly are gorgeous- the entire plant is a favorite of mine. I have a few in my backyard and there are a bunch in abundance in the woods by my house. One of my favorite parts about this project was everything was gathered locally.
 Here is a list of what you’ll need to get this project done:
undyed alpaca fiber or wool
mesh strainer
dye pot that will fit the amount of fibers being dyed
masher or spoon
white or apple cider vinegar
3-4 lbs of pokeberries to every pound of wool
pokeberries (for amount, see above ratio)
gloves (optional as pokeberries are both safe to touch and will wash off)
towel or hangers for drying
First step is to put the wool into the dye pot (it will save you an extra step if you use just one pot) and fill with a 50/50 solution of cold water and vinegar. Vinegar is used as a mordant (although it is not technically a mordant) which helps the pokeberries become colorfast (stick to the wool without later fading.) I do want to point out that at any stage of the game, using water that is too hot will felt your wool. Additionally, in this step and while dying, do not agitate the wool as it will have the same effect. Make sure the wool is soaked through, put on the stove and cover. Heat to simmering, turn down to the lowest setting and let sit for an hour. Again, do not boil. Turn the heat off and let cool overnight.
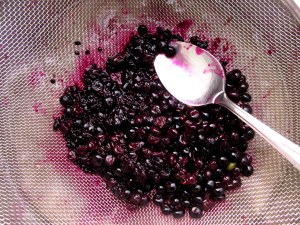
 The next day I prepped the berries for dying: pick the berries off of the stem (you may want gloves for this part) and mash in the strainer. The goal here is to get all of the liquid out that you can, leaving behind only the flesh and seeds. To save yourself an extra step and another dirty dish to wash, just put the strainer over the pot with the wool in it (after draining a bit of the solution out- you want just enough liquid to soak the wool) and mash away over the wool.
 It was pretty neat to watch the juice soak into the solution and the wool, I must admit. Stir gently to combine and voila! This is your dye bath.
 You can do this one of two ways- I left mine outside, in the sun (my patio gets fantastic light all day) for 24 hours OR you can heat it over the stove. To do this, you will need to keep an eye on it. You want your solution to be barely simmering for an hour to get pinks and fuchsias. Specifically, you want your water to be hot to touch without burning. Once the water gets to that temperature, turn the heat off and let cool. There are advantages to each- I chose to leave mine out in the sun because of two reasons: curiosity and because I was heading up to Maine to go visit my little brother. This way, you don’t have as much control but I still achieved some beautiful pinks and fuchsias.
The next step is rinsing.


 I used a very small amount of wool (although the ratio stayed the same- 3:1) as this was my first time dying wool and it made the rinsing process ridiculously quick and easy. For rinsing you will want to leave the water running until it runs clear and make sure to use cold water. You may or may not want gloves with this part. I didn’t have any troubles and it left less juice on me than picking the berries did. Either way, the pokeberry juice washed away easily with hand soap. Then comes the drying. As I have a basement, I draped my wool over two hangers and let sit for 24 hours. You can also lay it over a towel or a drying rack. The most important thing to remember is you want to lay it as thinly as possible for a speedier drying time.

 And for my next step, hand spinning!

 I’m mixing it with undyed alpaca fibers and it is gorgeous. I’m a drop spindle (although, a spinning wheel is on my wish list!) and I love it. What are your latest adventures with wool? xo, Ev.
Contents of my Knitting Bag
As a knitter I get a lot of questions. One of the most frequently asked is: “What do you carry around in your knitting bag?” So much, my friends, so much!
1. Stitch holders.
2. Clover point protector.
3. Boye size f crochet hook.
4. Size 7 circular needle (I make a LOT of hats.)
5. Mayan bead.
6. Pen.
7. Susan Bates “knit-chek.”
8. Chapstick (I have one in every room.)
9. Slip N Snip scissors.
10. Two darning needles.
11. Measuring tape.
12. Stitch markers.
13. Bike chain stitch marker (I like to work on bikes.)
14. Scrap yarn.
15. Row counter.
16. Three sets of DPNs (Sizes 0, 1 & 7.)
17. Cable needles.
The bag itself was handmade by the Again and Again recycled sails company in Gloucester, MA. Here is a link to her website: www.againnagain.com Each bag is handcrafted and super durable. I can’t recommend them enough! What’s in your knitting bag? xo, Ev.
Simple Knit Hats
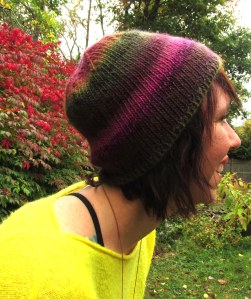
I absolutely adore knit hats- and I have quite the collection to prove it! For me, hats are great to knit in between projects, when traveling and as a side project. They’re quick, easy, fun and versatile. For the above hat pattern and yarn, keep reading through the article. The pattern below is the Kami Hat pattern and you can find it at www.ravelry.com/patterns/library/kami-hat. Once you get to Ravelry’s site, you can click on the direct link to her pattern. It’s incredibly easy and a great knit. I personally knit it tight in honor of my favorite college beanie, whereas I usually knit slouchy hats. The fingerless mitts are a gorgeous Aran Honeycomb pattern that I designed (but will not be made public until the testers are done with it.)
Fits small to medium- my head measures 22″ and it fits snugly yet on the loose side.
Classic Shades 3.5oz/100grams (color unknown)
Circular Needles size US7
Other materials used were: darning needle, scissors, 4 DPNs and a place marker.
Cast on 84 stitches and join in the round, being careful not to twist. For the next two rounds work in a knit 1, purl 1 rib stitch. On the next row (row 3) begin working in a straight stitch and continue until piece measures 5″ (or desired length-I usually knit until about 7″ for more slouch.) Begin to decrease:
knit 9, purl 2 together, repeat until end of row.
knit.
knit 8, purl 2 together, repeat until end of row.
knit.
knit 7, purl 2 together, repeat until end of row.
knit
knit 6, purl 2 together, repeat until end of row.
knit.
Note: At this point I switched over to double pointed needles (DPNs)
knit 5, purl 2 together, repeat until end of row.
knit.
knit 4, purl 2 together, repeat until end of row.
knit.
knit 3, purl 2 together, repeat until end of row.
knit.
knit 2, purl 2 together, repeat until end of row.
knit.
purl 2 together until end of row.
Take the remaining stitches off of the double pointed needles with your darning needle and cinch until a tiny hole is formed. Bring the working yarn through the hole and flip the hat inside out. Weave in ends and enjoy!
I would like to see pictures of your finished projects on Instagram- use the hashtag #knowloveknowcolor for a chance to be featured in my gallery! xo, Ev.
Homemade Apple Sauce- Farm to Table
Making homemade apple sauce is one of the easiest foods to make- the hardest aspect of it was how long it took to to peel and cut the apples up. So for those of you who are intimidated, don’t be anymore!
I spent a wonderful afternoon with a dear friend of mine, Monique, talking, laughing and relaxing in the warm fall sun as we wandered about the Carver Hill Apple Orchard. In the time we were there we covered some controversial topics, some news about friends, what friendship means to us and how to make homemade apple sauce. Food is manna for the soul, after all, and Monique and I share a love for fresh, healthy, tasty food. So as we picked, she shared this very simple recipe of hers with me:
Homemade Apple Sauce
Use as many apples as you would like and put into appropriate cookware *
Cover the bottom of your cookware with water to keep apples from burning
Let simmer for 20 minutes or until apples are mushy
Strain any water out
Use a potato masher and mash it up!
Sprinkle some cinnamon over and serve hot or chilled.
*Depending on how many apples you use (I used 15 in my process earlier) you can use anything from a dutch oven or crock pot to a skillet. A food processor or blender is optional (in lieu of a potato masher) but I don’t feel the need because the apples are so soft and it’s just that much more to clean. Let me know how yours came out! Happy cooking! xo, Ev.
DIY Painted Planter
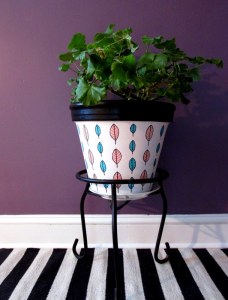
Plants are a necessity for me and as a result I have a lot of plain terra cotta and plastic planters to look at. I do have some gorgeous ceramic pots in my home but instead of switching over to more I decided to have some fun and re-vamp the ones I already have. I did a lot of planters where the main body was one color and the rim another (making sure to paint the inside as well) but for this particular one I decided to draw leaves on it for added pop. I used a sharpie marker for the outline and Crayola super tips for the fill. Next up for my planters I will be making lacy knitted covers! Use the hashtag #knowloveknowcolor on Instagram so I can see how you decorate your planters! xo, Ev.
Sweatshirt by Little Owl Arts. She has a great Etsy shop and you can find her blog here: www.littleowlarts.blogspot.com
Coat Rack, Part One
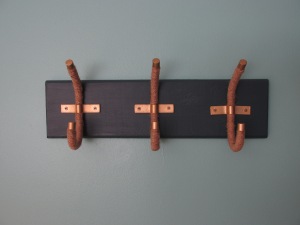
A beautiful, hanging coat rack was just what we needed in our home. The only problem was wall space and location- the kitchen doesn’t have an area where it would logistically make sense so I went with a blank space in the living room that I’ve been wanting to decorate. Since I intended it’s use to be for bags and not coats, I felt this space would work (and I love it! It’s function meets form.) There are all manners of really cool ways to make a hanging coat rack: re-purposing skis, oars, branches. For the hardware you could use rail road spikes, octopus coat hangers, roofing nails. I had every intention of making my own but when I came across this piece and it’s great hooks and hardware, I knew I had my first coat rack for my new home. All it needed was a fresh coat of paint- I didn’t like or agree with the maker’s version of rustic- the distressing was too intentional. I declared it perfect after a couple of coats of Mountain Midnight. xo, Ev.
DIY Lavender Sachets
For me, lavender is one of the most beautiful and calming scents there are. It took me a while to come around to it. I first truly fell in love when I added some lavender syrup to my hot chocolate (a coffeeshop I used to work at had the best hot chocolate I’ve ever had- the rich, hand mixed, expensive stuff.) I then bought a bottle of essential oil and would add a few drops to whatever I felt needed it: band aids for my cuts (it’s medicinal properties are numerous), bandanas, into a spray bottle with some water (store bought body spray smells too fake for me- I can smell the alcohol over the scent,) bath water. I would use lavender in my tea and in my spice mixes (I use it in my Herbes de Province mix.)
This summer I spent a lot of time at my in-laws’ house- my haven, right on the ocean. My mum in law lets me play in her garden and, bless her heart, raid it to my heart’s content! The abundance of lavender in her garden is astounding. Every time I would take some, it would grow back before my eyes! Of course, I’m exaggerating for effect, but not by much. All of this lavender really got me thinking about how to preserve it long after the snow hits the ground. I have a few bundles in some rooms of my house but when I came up with lavender sachets (I always liked to have some in my drawers and baskets growing up) I knew I had the perfect way.
They’re so easy to make! I did mine on a sewing machine (I’ve had an on and mostly off relationship with sewing machines over the years so this will not be a tutorial per say) for three quarters of it, sewing it inside out. I then turned it outside in and filled it with lavender- I found a funnel to be really helpful for this part. I then sewed up the rest by hand, hiding the stitches as I went (mostly, anyway, I need to brush up on my sewing skills!) and made sure to tuck the tail inside of the sachet. This part is really easy and a great trick: I pulled the needle out a couple of inches away from where it went in and made sure to push the fabric down as I held the thread taut and cut it. As you let go of the fabric, the tail will be pulled back inside of the sachet and will stay tucked away.
There are many ways to make sachets and as I make more, I will keep you posted. I have plans for personalized embroidered sachets and fabric tea bags. All of these make great Christmas stocking stuffers, birthday presents, home warming gifts and just a sweet way to say you care. I want to see what you come up with! Use the hashtag #knowloveknowcolor on Instagram so I can see your fun projects! xo, Ev.
DIY Painted Branches
Painted branches are a great way to sweeten up a corner in your home and are a cheap and easy craft- great for a fun project by yourself, with friends and even with kids. All you need is some paint and branches! I found all of my branches either on beaches (I’m always on the hunt for driftwood when I’m at the ocean) or in the woods on my morning hikes.
I used both acrylic and spray paint for mine, taping off the ends with one of my favorite items in my arsenal- blue artist tape. I kept mine mostly simple for this round but the next batch I’m working on I am using triangles and other geometric designs to make them more playful.
There are a variety of different mediums you can use to achieve all kinds of creative results: nail polish, paint markers, white out pens, even photo transfers if you have a big enough branch! I want to see what you guys come up with so the next time you’re on Instagram, use the hashtag #knowloveknowcolor and be sure to follow me, @knowloveofficial for more projects! xo, Ev.


